 When we were expecting Liam, people from all over the world sent us dinosaur artwork to add to a large dinosaur collage wall in the nursery. With Lila we’re going with an owl theme. This time around it’s been so much fun creating lots of different owl artwork with Liam to hang in his baby sister’s room. We’re not doing a crazy amount of artwork the same way we did with Operation Geekling Dinosaur Project this time or anything, but since Liam loves getting crafty with me, we’ve been making things together to hang in Lila’s room. (And we love the owl art that Katie and Dayna made for us – thank you!)
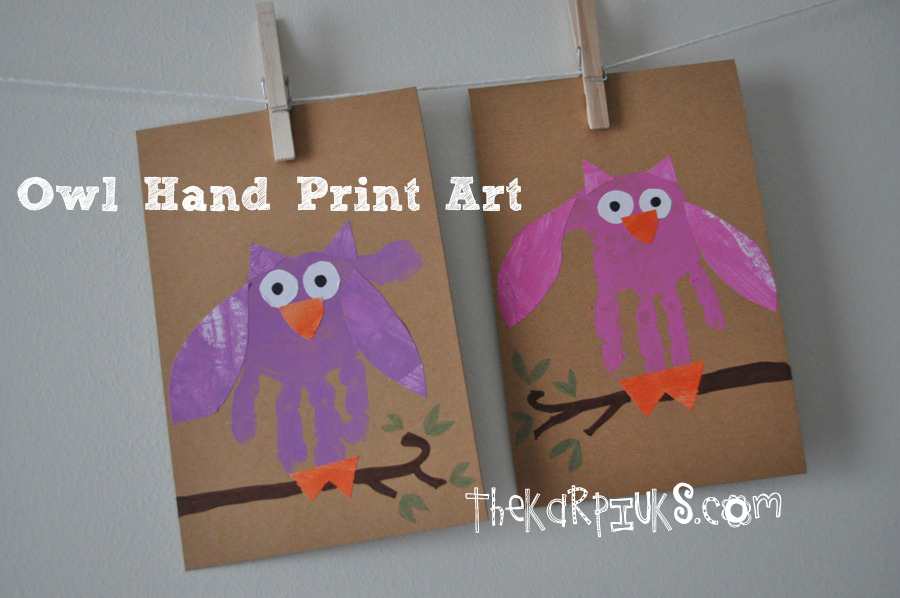
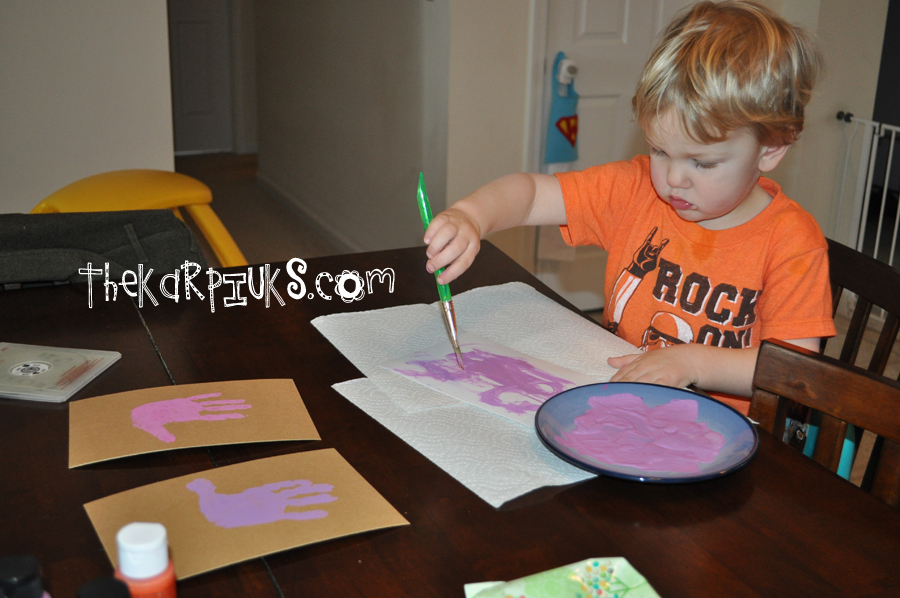
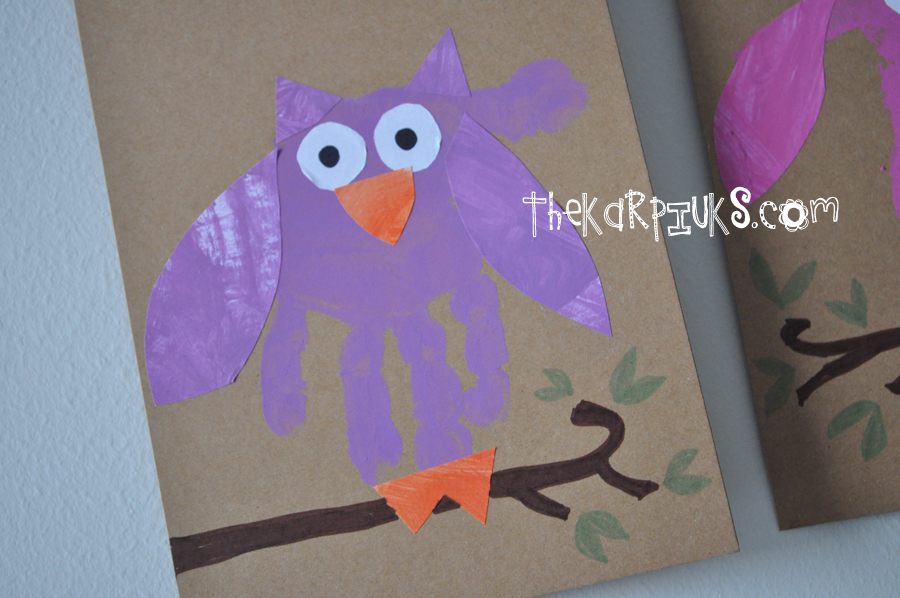
Our latest owl project for Lila’s nursery is owl hand print art. I painted one of Liam’s hands pink and one purple, and had him make one hand print each in the middle of two 5×7″ pieces of cardboard.
For the wings, eyes, beak, ears, and feet I got creative. I didn’t have any construction paper and didn’t want to completely do that part for Liam, so I gave him some blank white half-sheet mailing labels and let him paint all over them. So one half sheet he painted purple, one he painted pink, and then he painted a third label orange. Being a toddler, he didn’t really cover every square inch, but that’s part of what I loved about it. I just let him paint.
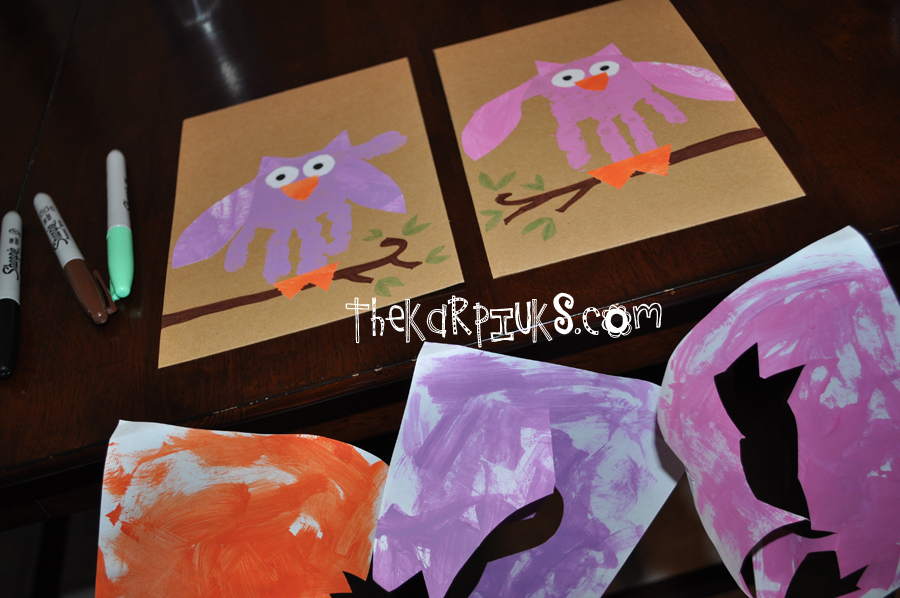
Let the paint dry. Next I peeled the painted mailing label sheets from their backing one at a time. With scissors I free-form cut two wings and the ears from the pink sheet and purple sheet. From the orange sheet I cut out two beaks and two feet shapes. Don’t think too hard about it, they don’t need to be perfect. The beauty of using sticky-backed mailing labels is that I just cut out the shapes from Liam’s painting and now he had stickers to affix right onto the hand prints. No messy glue needed! And don’t do what I started doing – cut out the shape BEFORE peeling the mailing label off. Trust me when I tell you that if you try to pull the paper backing off of the labels AFTER you’ve cut out the tiny little shapes from it, you’ll wonder why you ever decided to do this project in the first place, and possibly scream in frustration. Just do yourself a favor and fully peel the label off before you go to cut your shapes from it.
If I were doing this with a preschooler or older, I’d definitely let the kiddo cut out the shapes himself, but Liam just wasn’t ready for that part yet. (I should probably also pick up some toddler-safe scissors, now that I think of it.)
The rest is pretty simple: the hand print should be facing fingers down so that the heel of the hand is the top of the owl’s head. Give the kiddo the sticker shapes one at a time and let him stick the “stickers” to the hand print in the right places to give the owl ears, wings, feet, etc. I had an extra plain white mailing label, so I cut out circles for eyes and helped Liam stick those down, and then we arranged the beak between them.
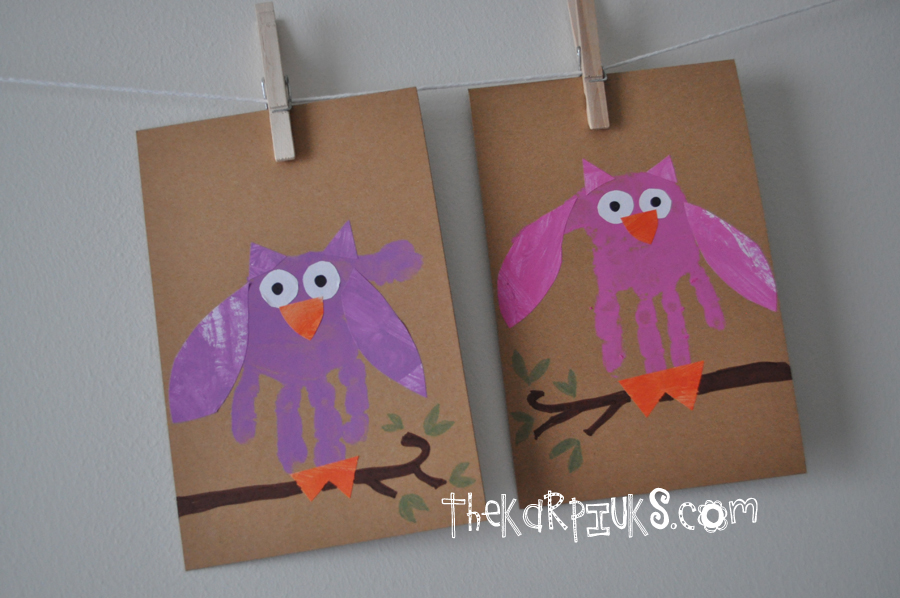
Grab a black Sharpie and color in pupils on the eyes quickly, and your adorable owls are done! I definitely think that the mailing labels made this project much simpler for all involved. After Liam went down for a nap, I used a brown and green Sharpie to add the branch and leaves to the artwork so the owls looked like they were perched on branches as part of a set. We hung them in Lila’s room together and they’re just perfect! I kind of want to make an entire army of hand print owls now…
 Â Â
  
Happy crafting!